Taking care of your microphone is key to keeping it in top shape for recordings and performances. Like any tech, it can gather dust, wear out, or lose quality without proper care. This guide offers essential tips to maintain your mic’s sound quality and longevity.
Regular upkeep extends your microphone’s life, prevents sound issues, and ensures reliability, avoiding failures during critical moments. Keeping it clean shows professionalism and care for your equipment.
Each microphone type—dynamic, condenser, and ribbon—has unique maintenance needs. This blog covers how to clean, store, and handle them properly, ensuring your mic performs at its best for years to come.
Understanding Your Microphone
To effectively maintain your microphone, understanding its mechanics and how it operates is crucial. Microphones, whether used in live performance, recording studios or for personal use, convert sound waves into electrical signals. This process is shaped by various factors such as type, diaphragm size, and the maintenance requirements that ensure longevity and performance integrity.
Differentiating Between Dynamic and Condenser Microphones
Dynamic and condenser microphones stand out as the primary choices for audio capture. Knowing the distinction between the two is essential for proper care and usage. Dynamic microphones are revered for their durability and versatility in handling high-volume sound sources. They are the workhorses of the microphone world, using a simple design that includes a wire coil moving around a magnet to create the audio signal. This construction makes them less sensitive to subtle sound nuances but an excellent choice for high-pressure situations like live concerts.
In contrast, condenser microphones employ a different technology with an electrically-charged diaphragm situated close to a backplate. This setup captures sound with greater fidelity and nuance, making them a preferred option for studio recordings where clarity and detail are paramount. However, their sophistication translates to a need for more careful handling and dedicated maintenance rituals. They generally require phantom power to operate and can be more prone to environmental damage than their dynamic counterparts.
The Role of Diaphragm Size in Microphone Performance
The diaphragm of a microphone is the component that vibrates in response to sound. Its size has a direct impact on the microphone’s performance characteristics. Larger diaphragms are more responsive to lower frequency sounds and subtle sonic details, which is why they’re often found in studio microphones meant for vocals or acoustic instruments. These larger diaphragms render a warmth and depth to recordings but can be susceptible to plosives and handling noise.
Smaller diaphragms, on the other hand, are more adept at handling higher frequencies and transient sounds. They can maintain a consistent tone even when the sound source moves slightly off-axis. Small diaphragm microphones are frequently used for capturing the nuances of string instruments, cymbals, and environments with complex audio characteristics.
Maintaining your microphone involves understanding how the diaphragm size influences its use and taking precautions to protect it accordingly. Larger diaphragms need gentle handling and often benefit from pop filters, while smaller diaphragms, though more robust, still require careful storage and occasional cleaning.
Recognizing When Maintenance is Needed
Regular maintenance is fundamental to the longevity of your microphone and guarantees consistent performance. Signs that your microphone needs attention include a notable drop in sound quality, unwanted noise or static during usage, and physical damage to the body or any connections. Should you observe such issues, a detailed inspection will determine whether cleaning, repairs, or professional servicing are necessary.
Environmental factors like dust, moisture, and smoke can adversely affect the performance of your microphone. Semi-annual cleaning to remove accumulated debris from the microphone grill and casing can help prevent these substances from causing harm. For condenser microphones, ensure humidity levels are controlled to avoid internal condensation. Storage plays a significant role as well; always keep your microphone in a protective case when not in use to safeguard against falls, knocks, and temperature fluctuations.
Lastly, for both dynamic and condenser microphones, regularly checking and replacing cables, ensuring all connections are secure, and avoiding extreme shifts in temperature or humidity will promote optimal functioning. If you use your microphone continually, schedule professional maintenance yearly to keep it in peak condition.
In summary, your microphone’s performance is highly influenced by its type, diaphragm size, and how well it’s maintained. By understanding these aspects and taking appropriate care, you ensure that your microphone will deliver high-quality audio for years to come.
Setting Up a Maintenance Routine
Ensuring your microphone performs at its best involves setting up a maintenance routine that is both thorough and regular. Commit to a routine that prioritizes the longevity and quality of your microphone. Remember that a well-maintained microphone can deliver consistent, high-quality audio, which is crucial whether you’re recording, broadcasting, or using it for live performances.
Creating a Cleaning Schedule
Establish a cleaning schedule that aligns with how frequently you use your microphone. If you use it daily, wipe it down after each use to remove any moisture or debris. At least once a week, conduct a deeper clean involving more precise tools and methods. This could include using a soft-bristled brush to gently remove any dust from the grille or casing, followed by a soft, damp cloth to clean the body of the microphone. It’s important to ensure you don’t use excess water or cleaning solutions that could seep into the microphone components and cause damage.
Monthly, disassemble any detachable parts of the microphone, such as the grille or windscreen, and clean them thoroughly. For condenser microphones, particular care should be taken when cleaning the diaphragm. Use a can of compressed air to gently blow away any dust. End the monthly routine by checking the cables and connectors for any signs of wear or damage, as these are crucial for signal transmission and overall sound quality.
Checklist of Tools Needed for Maintenance
To maintain your microphone properly, you’ll need the following tools:
- A soft, dry cloth for wiping down the microphone after use.
- A soft-bristled brush for delicately removing surface dust without scratching.
- A can of compressed air for dislodging dust from sensitive components.
- Isopropyl alcohol and a few cotton swabs for sanitizing and detailed cleaning.
- A screwdriver set that matches the type of screws on your microphone for disassembly.
- A storage bag or case to protect the microphone from dust and moisture when not in use.
- Optional: A foam windscreen or pop filter to reduce the impact of plosives and protect the mic from saliva and moisture.
- Optional: Desiccant packets to place in the microphone storage area to minimize moisture damage.
Each item on this checklist is chosen to help you address a specific maintenance task without causing harm to the microphone. Remember not to use any harsh chemicals or rough materials that could damage the microphone’s components. It’s also wise to have a dedicated space for maintenance where you can keep the tools organized and within reach for regular use.
Regular microphone maintenance ensures that you maintain not just the equipment itself but also the quality of your audio output, which reflects on your professionalism and dedication to your craft. Take the time to create and follow a maintenance routine, and you will prolong the lifespan of your microphone and preserve its performance standards.
Cleaning Your Microphone
Step-by-Step Guide to Cleaning External Components
Proper care extends the life and performance of your microphone. Begin by unplugging the microphone and removing any detachable parts like the windscreen or pop filter. If your microphone has a removable grill, detach it gently.
- Start by using a soft, dry brush to remove any loose dust or debris from the microphone’s surface and the grill.
- Next, dampen a lint-free cloth with water or an isopropyl alcohol solution (70% alcohol, 30% water), and carefully wipe down the external surfaces. Avoid letting moisture seep into any openings.
- For the grill, if it’s particularly dirty, you can submerge it in a soapy water solution. Use a gentle dish soap, agitate the water, place the grill inside, and let it soak for a few minutes.
- After soaking, rinse the grill under running water, then give it a shake to remove excess droplets. Let it air dry completely before reassembling your microphone.
- For the windscreen and pop filters, if made of foam, you can clean them with the same soapy water solution. Gently squeeze out the dirt, rinse, and let them dry completely.
Ensure everything is absolutely dry before reassembling and reconnecting your microphone.
Cautions for Cleaning Sensitive Internal Elements
Internal components of the microphone are delicate and can be damaged if handled improperly. Do not attempt to disassemble and clean inside your microphone, as this may void warranties and potentially harm the intricate workings.
- If you suspect internal contamination, consult the user manual. Some microphones are designed to allow user access to certain internal parts; however, follow the manufacturer’s instructions precisely.
- Should there be a need for internal cleaning, it’s advisable to seek professional services. Authorized repair centers have the expertise and equipment necessary to clean a microphone without compromising its functionality.
- Use a can of compressed air to blow out any dust from the grill or vents. Hold the can upright to avoid letting the propellant escape, which could damage sensitive parts.
Regular surface cleaning should suffice for routine microphone maintenance. Leave interior maintenance to professionals.
Products to Avoid to Prevent Damage
Selecting the right cleaning agents is pivotal to maintaining your microphone’s integrity. Incorrect products can cause corrosion, discoloration, and functional impairment.
- Avoid abrasive cleaners or cloths that can scratch the microphone’s surface.
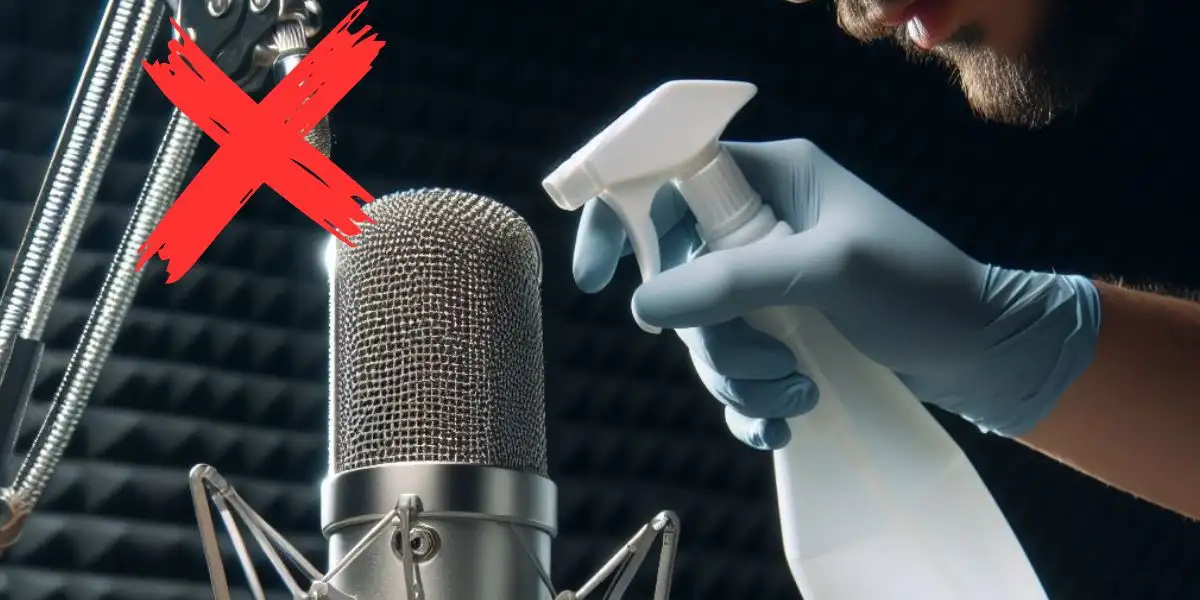
- Avoid spraying any cleaning solutions directly onto the microphone. Always apply to a cloth and then to the surface.
- Never use acetone, benzene, or harsh solvents on your microphone. These can damage the finish and plastic components.
- Bleach and ammonia-based cleaners are too harsh for microphone materials and may cause irreversible damage.
- Skip the use of silicone-based cleaners. These can leave a residue on the microphone that affects sound quality.
By carefully selecting appropriate cleaning methods and products, your microphone will continue to function at its best, providing crystal clear audio for your recordings or performances. Remember, the best maintenance is the one that’s preventive—take care of your microphone, and it will take care of your audio needs.
Preventing Moisture Damage
Moisture is the nemesis of high-quality microphones, capable of causing rust, corrosion, and circuit shorting. Protect your investment by ensuring the environment where you store your microphone is dry and well-regulated. Use silica gel packets or a dehumidifier if you’re storing microphones in areas prone to dampness. When not in use, keep your microphones encased in their protective pouches or cases, which should be a staple if you wish to maintain their longevity.
Best Practices for Storage
Storing your microphone correctly is critical in maintaining its condition. Designate a cool, dry place away from direct sunlight as your storage area. Use the original box or a hard case designed for microphone storage. Incorporate desiccants, like silica gel packs, inside the case to absorb any residual moisture. Avoid leaving your microphone on stands for prolonged periods, and always detach cables to prevent stress on connectors.
Handling Microphone Condensation
When moving your microphone between different temperatures, condensation can occur. If this happens, refrain from using the microphone immediately. Instead, let it acclimate to the new environment by resting it on a dry and clean surface for a few hours. Never attempt to speed up this process with a hairdryer or heater, as sudden temperature changes can damage the delicate internal components.
Dealing with Spills and Humidity
In the event of a spill, immediately disconnect the microphone if it is plugged in, and gently dry the exterior with a soft, absorbent cloth. Do not re-connect the microphone until it’s completely dry. High humidity environments are particularly challenging for microphone upkeep. If you reside in such a locale, consider investing in a small dehumidifier for your storage area. Monitor the humidity levels regularly to ensure they do not exceed 50-55%, which is ideal for sensitive electronic devices like microphones.
Dealing with Cable and Connection Issues
Inspecting and Maintaining Cables
Maintaining the integrity of your microphone’s cables is pivotal for ensuring clear sound quality and preventing technical issues. Begin by visually inspecting the entire length of the cable for signs of wear or damage, such as fraying, kinks, or exposed wires. If these imperfections are present, consider replacing the cable to avoid any interruptions in audio quality.
Ensure the flexibility of your cables by gently coiling them in a loop when not in use. Avoid wrapping the cable tightly around the microphone or any other equipment as this might stress the wires inside, leading to internal damage. It is also essential to disconnect the cables by pulling from the plug, rather than the cable itself, to prevent loosening the connection over time.
Regularly clean connectors with a soft, dry cloth to remove dust and residue that could interfere with the signal. If you encounter persistent static or signal loss, this could indicate oxidation on connectors. You can address mild oxidation by using a contact cleaner that is safe for electronics. Such cleaners will remove the oxidized material and ensure a better connection.
Lastly, storage plays a critical role in cable longevity. Store your cables loosely coiled, in a cool and dry environment, away from foot traffic and sharp objects that might cause damage. Proper storage will extend the lifespan of your microphone’s cables and maintain the audio quality of your recordings or performances.
Ensuring Optimal Connection Quality
To guarantee optimal connection quality, routinely check the connection points where the cable plugs into the microphone and the audio interface or mixer. Ensure the connections are secure without being overly tight, which could strain the ports and lead to connectivity issues.
Use the correct type of cable for your microphone and ensure compatibility with the input device. For example, balance XLR cables are typically used for professional-grade microphones due to their ability to reduce noise interference. Incorrect cable types can lead to poor sound quality and even damage the equipment.
It is also important to monitor the audio signal for consistency. Sudden drops in signal level or intermittent crackling can be a sign of loose connections. Should these symptoms appear, disconnect and reconnect the cable, ensuring a snug fit that is neither too tight nor too loose.
Another aspect of connection quality is the integrity of the input jacks on your devices. Over time, these jacks may become worn and affect connectivity. Inspect them regularly and consider having them serviced or replaced by a professional if they show signs of wear or if you’re experiencing persistent issues.
In scenarios where wireless microphones are in use, you’ll want to maintain firmware updates to guarantee optimal performance and compatibility. Also, keep the wireless receiver and transmitter within the recommended range of each other to avoid signal dropouts.
If interference is an issue, investigate nearby electronic devices that might be the source. Avoid running microphone cables parallel to power lines or placing equipment near devices that emit strong electromagnetic fields. Additionally, proper channel selection for wireless systems can mitigate interference from other wireless devices.
Remember, high-quality connections are not only about maintenance but also about the groundwork of using premium cables and equipment. Investing in equipment that meets industry standards and your specific needs can preempt many common issues related to microphone connections.
In conclusion, maintaining your microphone involves vigilant inspection and care for your cables and ensuring that all connections are of the highest quality. This attention to detail will prevent common issues, extend the life of your equipment, and allow for clear, uninterrupted audio in all your endeavors.
Protecting Your Microphone During Use
Ensuring the longevity of your microphone involves a mix of cautious handling and preemptive measures. Microphones, whether used for podcasting, music recording, or broadcasting, are delicate devices that can significantly benefit from proper care during active use. Protection during operation doesn’t just extend to physical shielding; it encompasses a broader spectrum of practices that can help preserve the quality and functionality of your microphone.
Tips for Reducing Wear and Tear
Reducing the wear and tear on your microphone should be a priority. Start with environment consideration. Utilize your microphone in controlled environments where temperature and humidity are maintained at stable levels. Extreme temperatures and moisture can damage the internal components of a microphone, leading to reduced performance or complete failure.
Handle with care and always secure the microphone properly. If it’s a handheld mic, maintain a firm grip without squeezing excessively. When using a mic stand, ensure it is balanced and stable. Unexpected drops or falls can be detrimental to its internal mechanisms.
Another key aspect is cable management. Remove cables by pulling the plug rather than the cord to avoid stressing the internal wiring. Keep cables detangled and stored neatly to prevent damage.
Lastly, manage sound levels. Guard against exposing the microphone to sudden loud noises which can create peaks that potentially damage its diaphragm over time. Maintain a reasonable distance between the microphone and the sound source to avoid overloading the microphone’s input.
Using Protective Gear
Protective gear is indispensable for shielding your microphone from numerous potential hazards. A pop filter, for instance, is a simple accessory that can serve dual purposes. It diffuses air from plosive sounds that can produce unwanted spikes in your audio recording and it also acts as a barrier against saliva, which can corrode and damage a microphone’s components.
Windshields or foam covers are further instrumental in reducing the amount of dust and particulate matter that can accumulate within the microphone’s grill, potentially clogging or damaging the delicate internal components. If you’re recording outdoors or in an environment prone to wind, using a windshield is crucial for high-quality sound capture and microphone preservation.
Carrying cases or pouches crafted from cushioning materials are invaluable for transportation and storage. When not in use, encase your microphone in these protective covers to minimize the risk of scratches, dents, and moisture infiltration.
Shock mounts provide isolation from vibrations and stand noise, ensuring that any physical disturbances are not transmitted to the microphone and recorded. Considering that certain vibrations can cause microphonic wear, the utilization of shock mounts is a prudent element of microphone protection.
Every precaution you take towards protecting your microphone during its use not only extends its shelf life but also maintains the fidelity of sound it captures. Remember, careful handling is the bedrock of microphone longevity. Adhering to these guidelines will keep your microphone in prime condition, thereby safeguarding your investment and ensuring consistent audio quality for all your recording needs.
Microphone Storage Solutions
Choosing the Right Storage Environment
Protect your investment in high-quality audio equipment by selecting an ideal storage environment for your microphone. Consider temperature and humidity as key factors. Your microphone functions best when stored in a cool, dry place, preventing degradation of internal components. Aim for a consistent temperature between 59 to 77 degrees Fahrenheit to mitigate the risk of material warpage or the accumulation of condensation. Relative humidity levels should be maintained between 35% to 45% to prevent moisture damage. Use a thermostat and hygrometer to regularly monitor these environmental conditions.
Consider dust and sunlight when choosing your storage location. Microphones are sensitive to dust, which can impair sound quality or cause damage. Store microphones in a closed space away from direct sunlight, which can fade or crack exteriors over time. Soft, padded cases or cabinets with a locking feature not only prevent physical harm but also restrict UV exposure. Similarly, avoid areas with strong magnetic fields such as those generated by speakers and amplifiers. Long-term exposure to these fields can negatively affect microphone performance.
An additional step in safeguarding your equipment is using silica gel packets or a dehumidifier. These will help maintain dry conditions, particularly if your storage area is prone to dampness. Keep in mind that overexposure to air conditioners or heaters can also result in unwanted changes to your microphone’s components. Select a storage space with minimal airflow disruptions.
For portable microphones, ensure they are disengaged from cables and turned off before storing. This practice saves power and reduces wear on connections.
Organizing Cables and Accessories
Well-maintained cables and accessories extend the longevity of your microphone setup. Begin by detangling all cords before storing to avoid kinks and knots, which can lead to internal wire breakage and signal degradation. Employ cable ties or Velcro straps for neat organization, securing cables loosely to prevent strain. After coiling, store your cables horizontally rather than hanging them, which can lead to internal stress over time.
To further prohibit damage, designate specific containers or bags for different types of equipment. This system not only prevents scratches or dents but also eases the search process when setting up. Using containers with clear labels specifying contents—such as ‘XLR cables’, ‘Power Supplies’, or ‘Shock Mounts’—eliminates confusion and accelerates unpacking for performances or recordings. For improved accessibility and more structured storage, consider using a cable rack or organizer.
Invest in protective cases for microphones and essential accessories. Hardshell cases with foam cutouts offer a tailored fit, delivering maximum protection against shock and vibration during transport. For a more budget-friendly option, padded bags can suffice for less rigorous environments.
Another consideration is the backup of calibration settings or digital profiles. Digital or USB microphones may require resetting if left unused for prolonged periods. Save your settings externally so that you can quickly restore your preferred configurations when needed.
Sound professionals should take note of warranty cards, instruction manuals, and spare parts. Keep these associated documents and items in a single, accessible folder or case. Quick access to this information or backups is invaluable for troubleshooting or when requiring technical support.
Ensuring the care of your audio equipment through mindful microphone storage solutions translates to prolonged equipment life and consistent audio quality. Make the most of your gear by staying diligent with these practices, and you’ll find your microphone ready for optimal performance whenever it’s called upon.
Technical Maintenance
Ensuring the longevity and optimal performance of your microphone involves staying up to date with technical maintenance. Periodic checks are essential, as they help to prevent minor issues from escalating into significant problems. Regularly inspect the physical condition of your microphone, looking for signs of wear, corrosion on the contact points, or any visible damages that could impact the sound quality or functionality. Clean your microphone according to manufacturer specifications, using appropriate cleaning agents and soft cloths to avoid scratching or tarnishing sensitive components.
Cable connections should be secure and without damage. Any fraying or splitting wires need immediate attention, as they can result in a loss of signal or unwanted interference. Dust and debris can accumulate in the connectors and on the diaphragm of your microphone, so compressed air can be useful for gentle cleaning. Verify that the microphone stand and any additional support mechanisms are sturdy and functioning correctly, as instability can lead to physical mishaps that compromise the integrity of your microphone.
In an environment where your microphone is exposed to extreme temperatures or humidity, be proactive in utilizing protective measures such as shock mounts, pop filters, and carry cases that can provide the necessary barrier from these potentially harmful elements. Calibration is another vital aspect of technical maintenance, as it ensures that your microphone is producing accurate and consistent sound levels. Utilize sound level meters and recording software to test and adjust your microphone’s sensitivity as required.
Recognizing When Professional Service is Required
While routine maintenance can be performed independently, recognizing when to seek professional service is crucial. Indications such as persistent static noise, significant drops in audio levels, distortion at normal speaking or singing volumes, or any irregular function that cannot be resolved with simple troubleshooting steps, are signs that professional help is needed. If the microphone has taken impact damage or been exposed to liquid, refrain from using it and consult a technician.
For vintage or high-end microphones, professional servicing is recommended for complex internal repairs or when specialized knowledge is needed for handling delicate components. Moreover, warranties often necessitate that repairs be carried out by authorized service centers to remain valid. When sending your microphone for servicing, ensure that it is packed securely, and insured during transit to protect against further damage or loss.
Firmware Updates and Software Calibration
In a digital age, microphones are not solely mechanical but often incorporate firmware that requires updates. These updates are designed to enhance functionality, introduce new features, or patch existing software vulnerabilities. Manufacturers frequently release firmware updates, which can be downloaded from official websites. Be certain to follow installation instructions precisely to avoid firmware corruption.
Software calibration is another aspect of digital microphones that must be addressed. Proper calibration ensures that your microphone interacts effectively with recording software, maintaining audio integrity during the digitization process. Calibration typically involves setting appropriate input levels within the software, accounting for latency, and using calibration tones to synchronize the microphone’s response with the software’s processing.
Some advanced microphones come with dedicated software that allows for detailed customization and adjustment. Familiarize yourself with these tools to take full advantage of your microphone’s capabilities. Regularly check for software updates to ensure compatibility with the latest operating systems and recording software. If you’re uncertain about the calibration process or encounter issues during firmware upgrades, do not hesitate to reach out to the manufacturer or a qualified technician.
Maintaining your microphone through attentive technical maintenance, seeking professional service when indicated, and staying current with firmware and software calibration are vital steps to preserve the quality and longevity of your device. These practices ensure that you can deliver superior audio output, whether you’re recording, performing live, or communicating in virtual environments.
Addressing Common Microphone Problems
Feedback and Distortion
Experiencing feedback and distortion can not only be annoying but also detrimental to your audio output. Feedback often presents itself as a loud, screeching sound that occurs when the microphone picks up the sound from the speakers and re-amplifies it. This loop can be halted by adjusting the microphone’s position related to the speakers, ensuring you are not directly in front of them. Distortion, on the other hand, may stem from overpowering the microphone input levels. Keep the input gains in check to avoid peaking that leads to distortion. If you’re using a digital interface or mixer, maintain peak levels around -6dB to -3dB to safeguard your audio from clipping and unwanted noise.
Drop in Audio Quality
Should you notice a decrease in audio quality, a few culprits could be to blame. Dust and debris accumulation on the microphone diaphragm can dampen sound quality. Regularly clean your microphone with a soft, dry cloth or a gentle air blower to remove dust without damaging the sensitive components. Also, check for any corrosion or oxidation on the connections. Using a contact cleaner can effectively resolve connectivity issues. Poor cable quality or damage can impede signal flow, so inspect cables for wear and tear, and consider investing in higher quality cables for extended reliability and clearer sound transmission.
Physical Damages and Their Fixes
Microphones can withstand some wear and tear, but physical damage such as dents, loose parts, or connector issues can severely affect performance. If the grille on your microphone has been dented, carefully try to bend it back into shape. If internals are damaged, replacement parts—such as diaphragms or capsules—can be sourced from the manufacturer. For connector problems, ensure that the XLR or USB connections are not loose. If they are, they may need to be re-soldered or replaced. When suffering from persistent issues or when in doubt, consulting with a professional audio repair service is the most reliable course of action to maintain your microphone in pristine condition.
Upgrading and Replacing Parts
When to Upgrade Your Microphone Components
Determining the right time to upgrade microphone components depends on various factors. Firstly, if you notice a dip in audio quality, such as static noise, crackling, or reduced clarity, it may indicate that certain parts are wearing out. Professional use demands precision, and if your recordings or streams have accumulated unfavorable feedback regarding sound quality, upgrading becomes essential.
On the other hand, technology advances rapidly, and the market often introduces new features that can boost your microphone’s performance. If you come across components with superior noise-cancellation, higher sensitivity, or more robust interfacing capabilities, and these enhancements align with your needs, consider an upgrade.
Finally, consider upgrades for compatibility reasons. If you’ve changed your audio system or moved to a different recording environment, your microphone may require specific upgrades to maintain optimal performance in the new setup. High-end studios, for example, might need additional components to fit into an advanced audio interface ecosystem.
Finding Compatible Parts and Accessories
Navigating the market for microphone parts and accessories requires careful consideration to ensure compatibility and quality. Research is paramount. Start by checking the manufacturer’s website for recommended replacement parts or upgrades for your specific model.
Online forums and communities dedicated to sound engineering and recording can be invaluable resources. Experienced users and professionals often share insights and recommendations on upgrade paths for specific microphone models.
When shopping, pay close attention to reviews and ratings. Trustworthy retailers of audio equipment will often feature customer reviews that can highlight the reliability and performance of specific components. Additionally, you might contact the manufacturer or vendor for confirmation if you’re uncertain about the compatibility of a particular part.
Also, consider the warranty and support options. Reliable brands and resellers will offer warranties on parts, which can provide peace of mind and protection against defects.
For accessories such as pop filters, stands, and shock mounts, ensure they can accommodate the weight and size of your microphone. Check the specifications and, if possible, look for adjustable options to ensure they fit a range of models.
Cables are critical for signal transmission but often overlooked. For upgraded performance, seek out cables with high-quality connectors and shielding. This can reduce electromagnetic interference and preserve audio purity.
In summary, staying informed about your microphone’s model specifics, market innovations, and reliable sources for purchasing replacements will ensure you make well-informed decisions. Timely upgrades not only extend the life of your equipment but also enhance your audio recording quality, permitting you to deliver professional-grade sound every single time.
Final thoughts
To keep your microphone in top shape, protect it from dust, moisture, and physical damage. Store it in a dry, clean place, regularly check cables, and handle it gently. Clean the body with a soft cloth, and maintain any replaceable parts like windscreens.
Good maintenance ensures clear sound, extends the microphone’s life, saves money on repairs, and boosts your professional image. Set a routine for cleaning and inspecting, especially if you use it often, and stay updated on software for USB mics.
By following these habits, you’ll keep your microphone performing at its best for years to come.
Leave a Reply